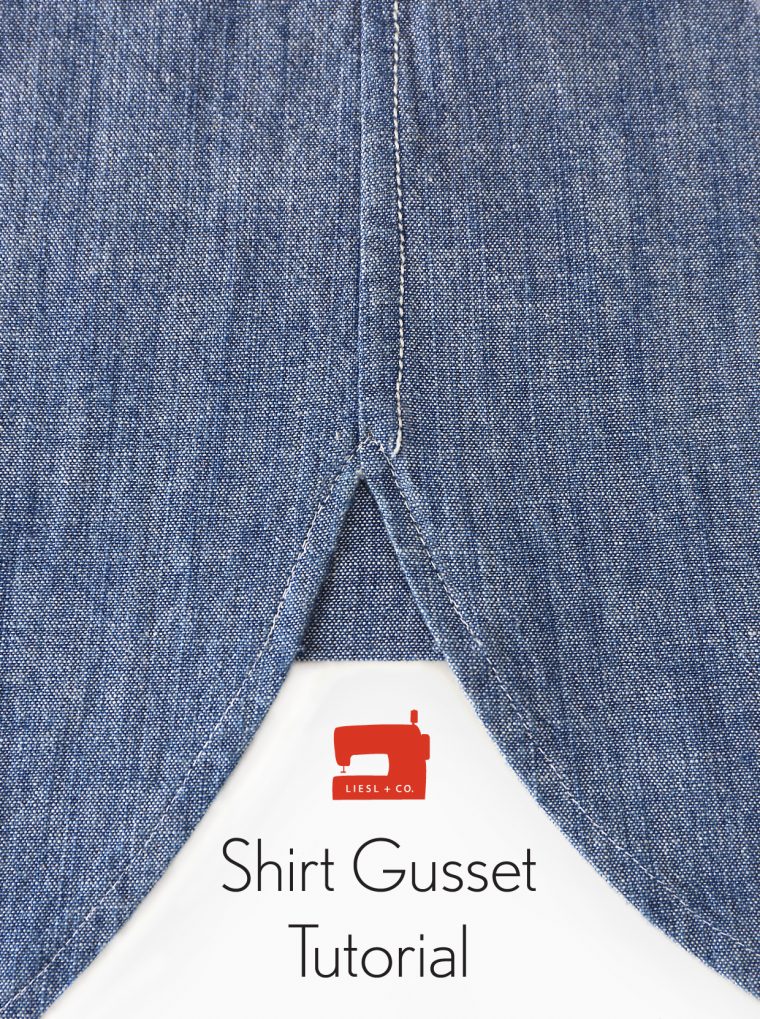
a shirt gusset tutorial
Sometimes when you look at off-the-rack shirts, you'll notice a small triangular detail near the side seam. I personally refer to this as a gusset. This little addition not only fills in the gap at the side seam but also strengthens the area where the shirt's panels come together, which is often subjected to stress. Additionally, it slightly extends the length of the shirt, helping it stay tucked in more neatly. It’s also an excellent way to inject a touch of unexpected color or pattern into a classic design without being too bold.
This is a fantastic detail that you can incorporate into any shirt or top pattern featuring side seams, such as our Liesl + Co. Classic Shirt and Gallery Tunic + Dress. For an added flair, consider using a contrasting fabric for both the underlap of the sleeve placket and the side gusset. After all, it's the subtle details that truly elevate a garment!
To begin, download our free gusset pattern piece, which comes in two sizes to suit your preference. You will need one diamond-shaped piece per gusset, so cut two pieces for each Classic Shirt or Gallery Tunic you plan to create.
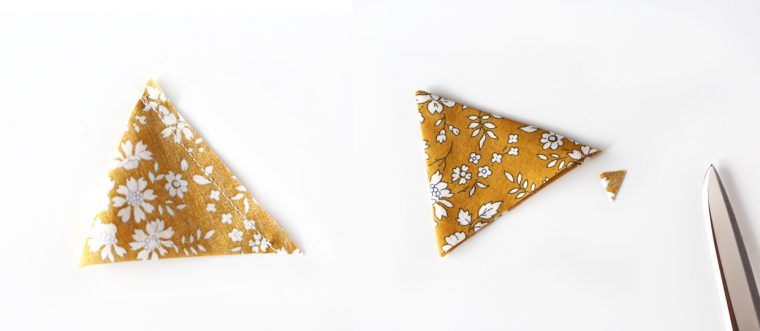
1. Start by folding one diamond in half along the fold line and stitching one side edge with a 1/4-inch seam allowance. (For clarity, I used a printed fabric for the first few photos so you can easily distinguish between the right and wrong sides.)
2. Trim the corners and turn the resulting triangle right side out before pressing the edges flat. At this stage, you should have one stitched edge, one folded edge, and one open edge.
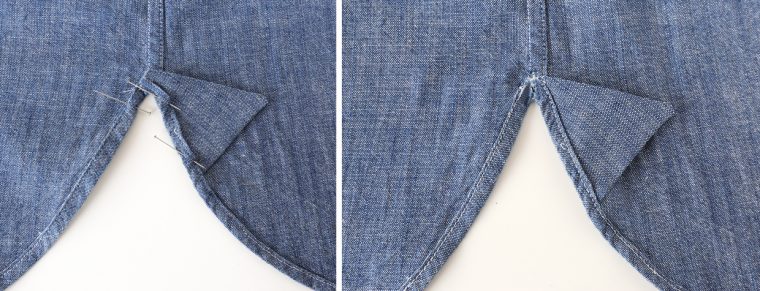
3. Prepare your shirt hems by folding, pressing, and getting them ready for stitching. Before stitching the hem, insert the unfinished edge of the triangle into the folded edge of the hem. Ensure the folded edge of the triangle points downward, while the stitched edge faces upward.
4. Sew the hem, making sure to catch the edge of the triangle within the seam. Pivot at the side seam to continue stitching along the next section of the hem.
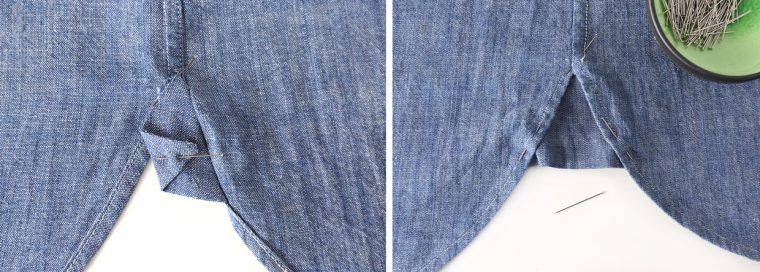
5. Press the gusset away from the hem, directing it toward the other side of the shirt, ensuring it fully covers the opposite hem. Take care to align everything precisely so that the gusset lays smoothly across the hem.
6. Once the gusset is securely pinned in place, re-sew the hem on the opposite side of the shirt to hold the gusset firmly in position. You can either overlap the original stitching or sew alongside it to complete the process.
And that’s all there is to it! Experimenting with the gusset detail is a lot of fun. We’re excited to see how you incorporate this into your creations.
100% Polyester Lace Without Spandex
100% Polyester Lace,Boarder Trimming Lace,Metallic Lace Fabric,Rose Lace For Garment
SHAOXING XINGZHOU TEXTILE CO.,LTD , https://www.eurofashiontextile.com